
Concepts with a VLM
Coactive Concepts with a VLM
With a vision-language model (VLM), you can create a concept from a written description instead of finding and labeling examples yourself. You describe what the concept should find, preview sample results from your dataset, and then create the concept. Coactive seeds the concept with about 4,000 labeled examples from your dataset. The VLM labels the keyframes and images closest to your description as positive or negative. Coactive then trains the concept on those labels. You improve the concept by reviewing its labels and adding your own.
This works much like Create Dynamic Tags with Labels, applied to a single concept. For what Concepts are and when to use them, see Concepts with Manual Labeling.
Before you begin
Concepts with a VLM is turned on only for organizations that request it. If you have access, the “Create a Concept” page has a “Preview” button at the top. If it has “Create” and “Cancel” buttons below the form instead, contact Coactive support to request access, or follow the manual labeling steps.
Create a concept from a description
- Log in to your Coactive account.
- Go to the Concepts tab and select “Create a Concept” in the right-hand corner.
- In the “Dataset” field, choose your_dataset_name.
- In the “Name” field, enter your concept’s name. Names can contain only letters, numbers, and underscores, up to 80 characters.
- Example: aerial_shots
- In the “Description” field, describe what the concept should find, in up to 500 characters. The description is required, and it directly affects how well the concept performs. The VLM uses it to sample and label keyframes and images from your dataset. Make the description as detailed as you want the concept to be. If you leave something out, the VLM makes its own assumptions and can mislabel keyframes and images. Name the theme and include a few examples of what it looks like.
- Example Definition: A shot taken from high in the air, such as from a drone, helicopter, or plane, looking straight down or at a downward angle. Shows a wide area from above: city skylines, neighborhoods, coastlines, forests, farmland, highways, or stadiums. Buildings, cars, and people look small, and rooftops or the tops of objects are visible. Exclude ground-level shots looking up at tall buildings or close-ups of aircraft.
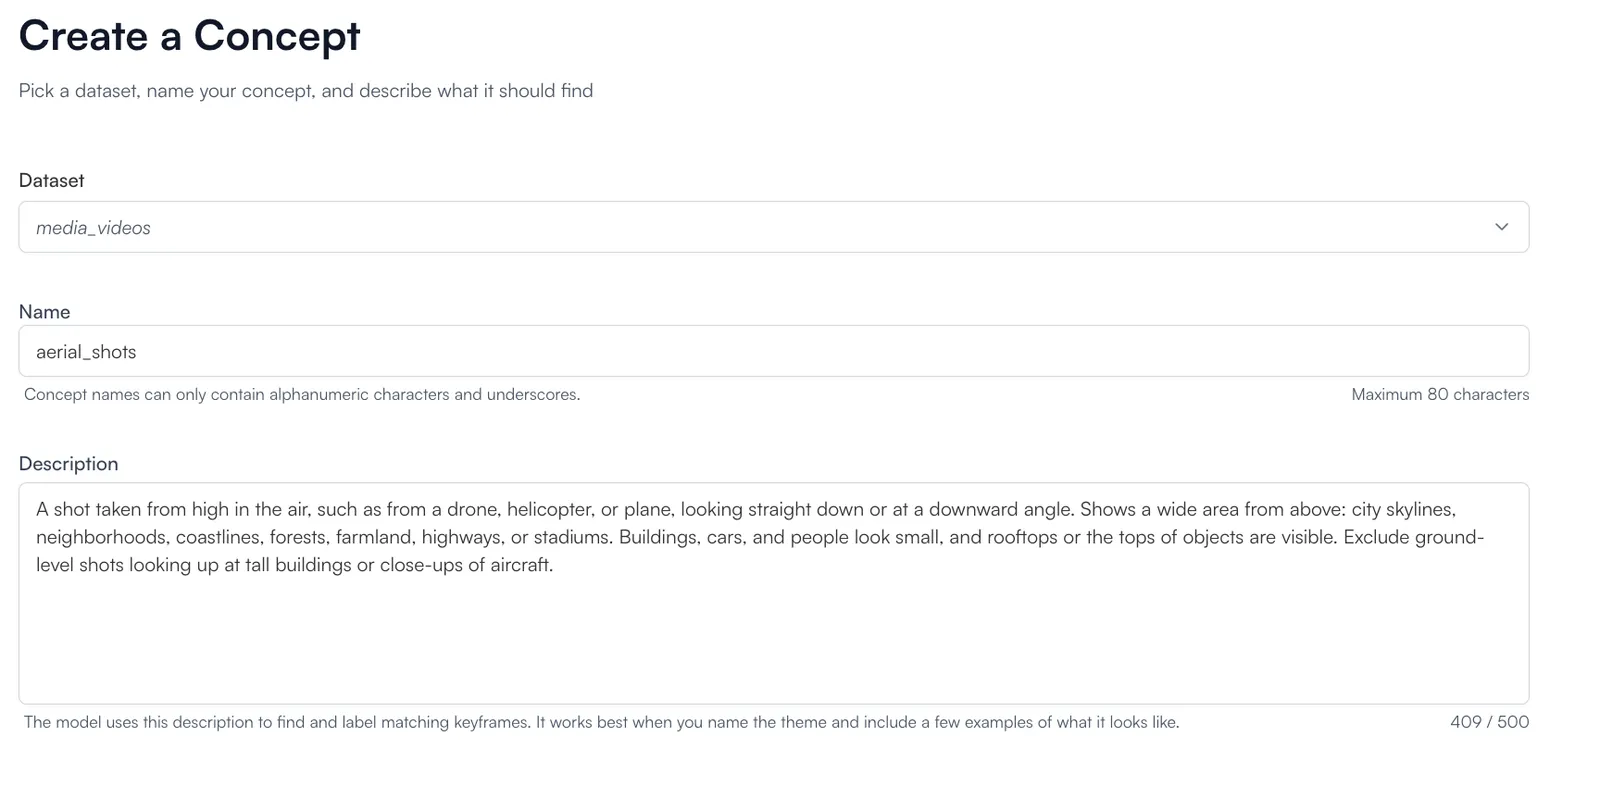
- Example Definition: A shot taken from high in the air, such as from a drone, helicopter, or plane, looking straight down or at a downward angle. Shows a wide area from above: city skylines, neighborhoods, coastlines, forests, farmland, highways, or stadiums. Buildings, cars, and people look small, and rooftops or the tops of objects are visible. Exclude ground-level shots looking up at tall buildings or close-ups of aircraft.
- Select “Preview.” The “Preview results” page shows sample results from your dataset for your description. Select a result to see it in more detail.
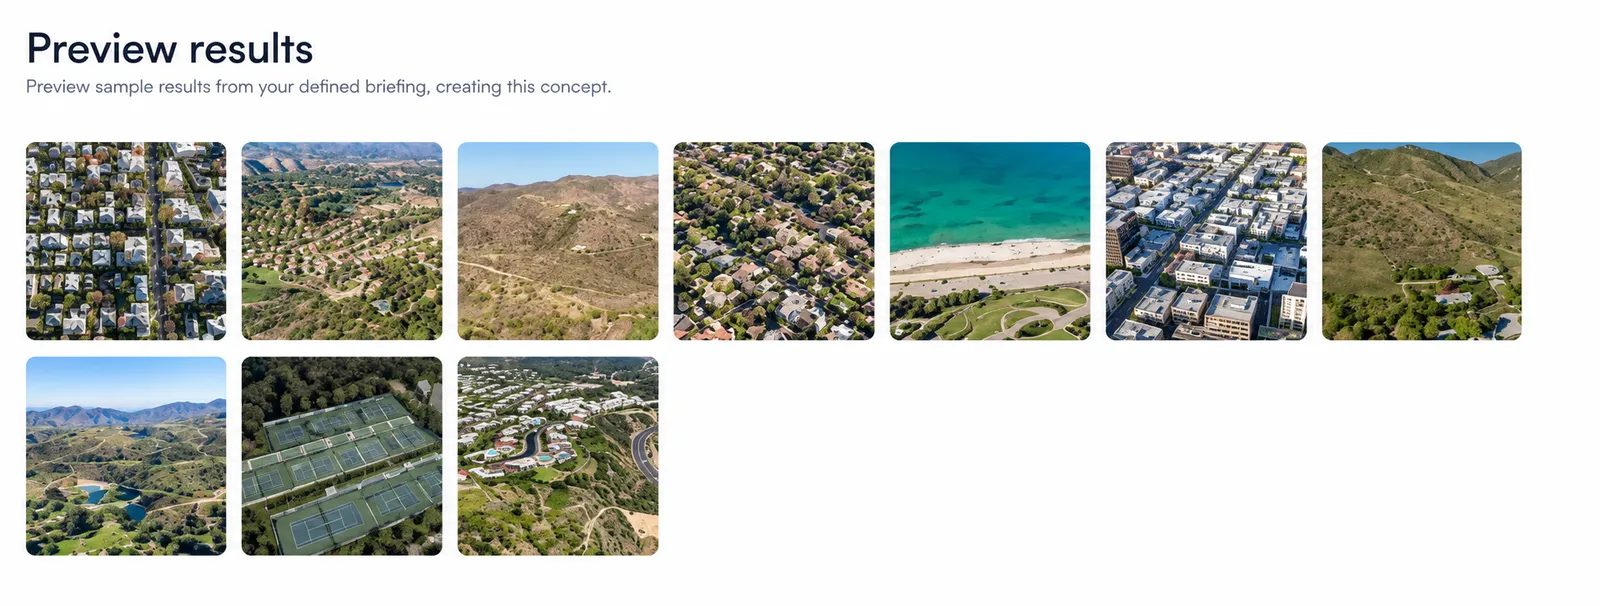
- Optional: If the results don’t match your concept, select “Back” at the top of the page, revise the description, and select “Preview” again.
- Select “Create.” Coactive opens the concept’s page and starts building the concept.
Track the concept build
While Coactive builds the concept, the concept’s page shows “Creating concept.” The progress bar moves through four stages: “Analyzing your dataset,” “Labeling examples,” “Learning from examples,” and “Scoring your dataset.” The build takes about 10 minutes. You can leave the page and return when it finishes.

To check on a build without opening the concept, go to the Concepts tab. On the Concepts dashboard page, the “Status” column shows “Sampling,” “Labelling,” “Training,” or “Scoring” while a concept builds. After the build, it shows “Scored” if the build succeeded or “Error” if it failed. It shows “Draft” if the build found only one kind of label, as described in Add missing labels.
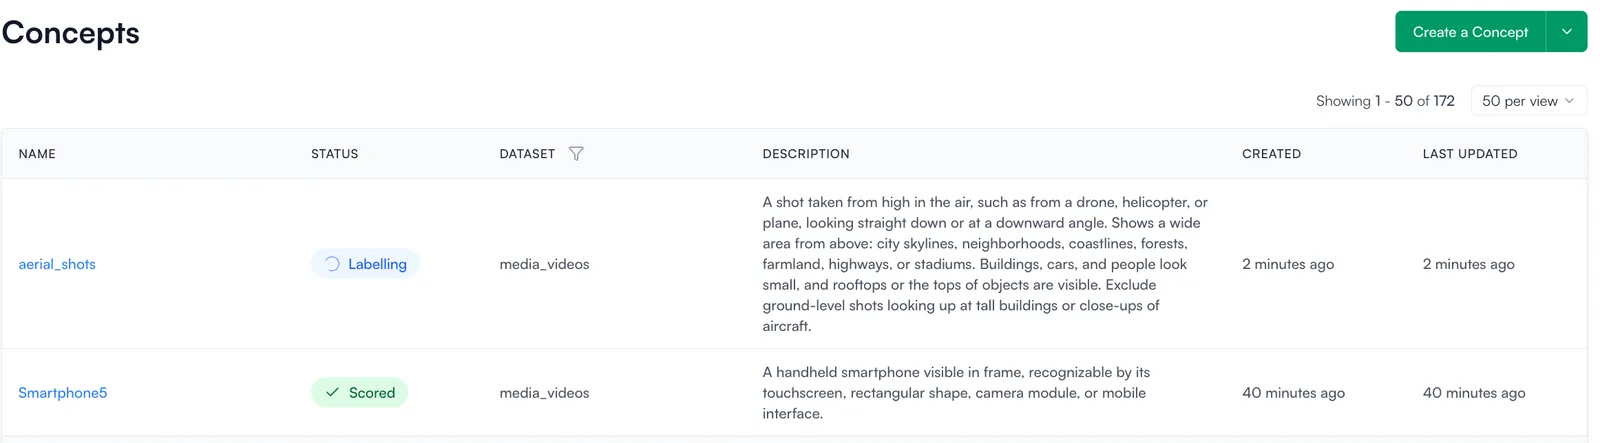
If the build fails, the concept’s page shows “We weren’t able to create this concept.” Create a new concept to try again.
Add missing labels
A concept needs both positive and negative labels to train. Sometimes the build finds only one kind for your description. The concept’s page then shows a warning, such as “We couldn’t find any negative label based on your description.” The “Top content” tab stays hidden and the page shows the “Labels” tab.
- On the concept’s page, open the “More” menu and select “Select examples.”
- Label matching or non-matching results to add the missing kind of label.
The “Top content” tab returns after the concept has both kinds of labels.
Correct false positives and false negatives
The VLM labels examples from your description as written, so some labels might not match what you intended. An example can fit your description without being what you meant, or a word in your description can steer the VLM toward related content. The concept learns from these labels, so after the build finishes, check them and correct any that don’t match your concept:
- A false positive is an example labeled positive that doesn’t match your concept.
- A false negative is an example labeled negative that does match your concept.
- On the concept’s page, open the “Labels” tab. It shows the keyframes and images the VLM labeled from your description, along with any labels you’ve added.
- Select “Positive” to show the positive labels.
- Select each example that doesn’t match your concept. In the side panel, select “No” to change its label to negative, or select “Remove label” to remove it from the concept’s labels.
- Select “Negative” to show the negative labels.
- Select each example that matches your concept. In the side panel, select “Yes” to change its label to positive, or select “Remove label.”
The “Labels” tab lists labels by when they were added, newest first, not by score. A label you add appears at the top of the list.
Review and refine the concept
After the build finishes, the “Top content” tab shows the keyframes and images the concept scores highest in your dataset. If they don’t match what you want the concept to find, correct the concept’s labels. To add more labels, select “Continue labeling” or “Select examples” from the “More” menu. For labeling guidance, see Advanced Troubleshooting.