Dynamic Tags (beta)
Dynamic Tags provide a fast, scalable way to generate metadata across large media libraries. With just a list of user-defined keywords or natural language phrases (e.g., objects, activities, locations), you can automatically classify and organize millions of images or hours of video in minutes.
Built on Coactive’s multimodal AI, the system maps content to your chosen tags and assigns each a relevance score. These scores can be queried directly in SQL, enabling precise filtering and large-scale analysis for metadata tagging, content discovery, and downstream analytics.
How It Works
Creating and refining metadata across your organization is easy with Dynamic Tags.
Create Tags
Step 1: Define Your Tags
- Log in to your Coactive account
- Go to the Dynamic Tags tab
- Click “Add Group”
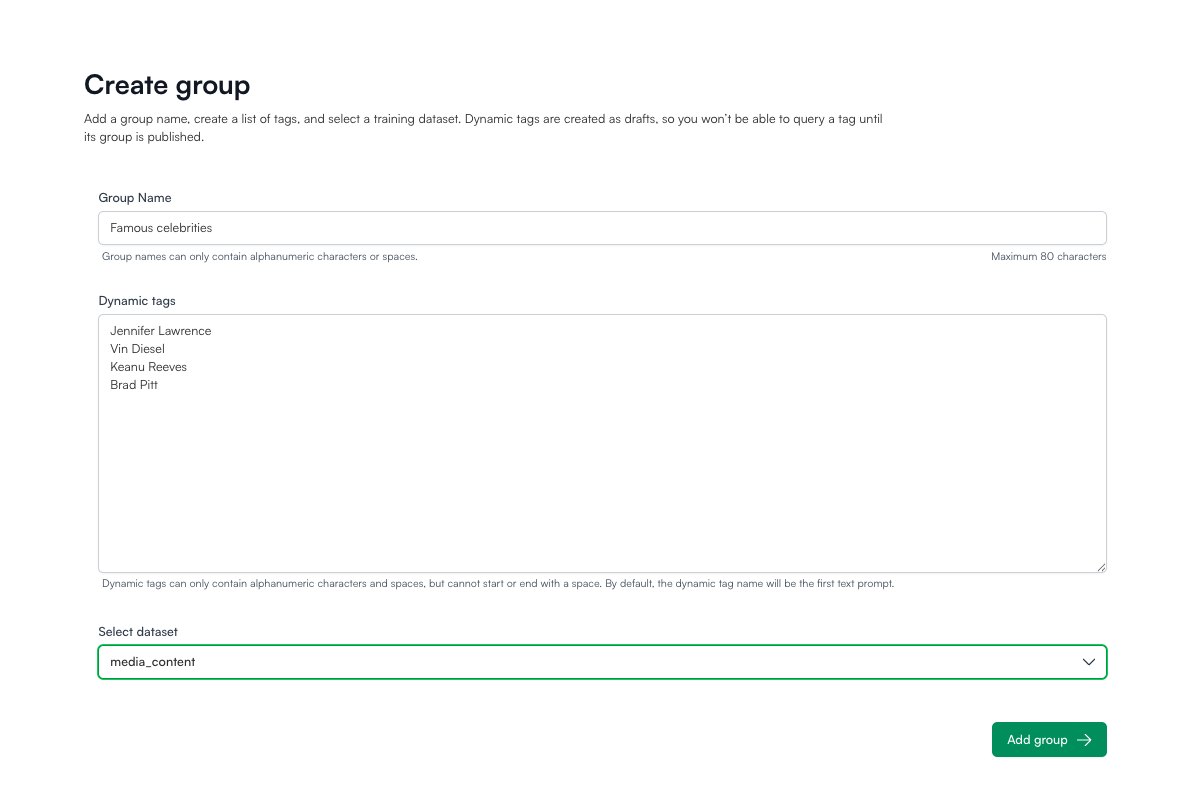
- Select the relevant dataset and give your tag group a name (e.g., “Celebrities”)
What’s a Group?
A Group is a logical category that helps organize related dynamic tags.
- In e-commerce: a group like “Product Categories” might include tags like “Clothing,” “Appliances,” and “Toys.”
- In media: “Celebrities” could include tags like “Taylor Swift,” “Will Smith,” and “Jennifer Lopez.”
- In advertising: an “IAB Tags” group might contain tags such as “Food,” “Health,” and “News.”
Step 2: Add Your Tags
Enter one keyword or phrase per line in the bulk input box. Each entry becomes both the tag name and its initial positive prompt, which the model uses to get started.
Tag names are limited to letters, numbers, and spaces, while prompts can include special characters (punctuation, symbols, etc.) to better capture user intent. You can edit tag names or prompts later, but your initial preview will be based on these inputs.
💡 Tip: Use clear, descriptive tag names. Avoid placeholders like
test_v1orandres2024- since tag names directly shape the model’s initial results.
Step 3: Select a Dataset
Choose a dataset within your organization to serve as the training dataset. The model will use this dataset to refine tag definitions with visual prompts.
When you publish the tag group (explained later), scoring is automatically run across all assets in this dataset.
Later in the workflow, you’ll also have the option to apply these trained tag definitions to other datasets in your organization.
Step 4: Create the Tag Group
Click “Add Group” to submit your tag list and generate your tag group.
Once created, you’ll land on the Group Overview page, where you can monitor the status of each tag.
Preview Tagging Results
When you open a tag, you’ll land on its Preview Page. Here you can review how the model applies the tag across different modalities and tagging levels:
- Video Frames
- Video Shots
- Transcripts
Each frame, shot, or transcript segment is assigned a relevance score between 0 and 1.
Video Frames and Video Shot Views
By default, the Preview page shows a Compare View: A random sample of results the model considers positive or negative, based on the text and visual prompts you provided and a default threshold of 0.5.
You can adjust the threshold and instantly see how tag assignments change. If you save a custom threshold, it will be applied when populating the scoring tables (explained later).
You can also switch the view to show only positives or only negatives. These views aren’t exhaustive - they’re meant to help you experiment and decide the best threshold for your use case.
Transcript View
In the Transcript tab, the Preview page defaults to showing positive results. You can use the dropdown to switch and view negatives.
Just like in Frames and Shots, the results are samples only - they don’t represent the full set of content that matches this tag.
You can also:
- Adjust the threshold to refine which transcript segments are considered positive vs. negative
- Sort results by score within each bucket (positive or negative)
Refine Tags
Once tags are created, you can refine them using the Preview Page. Adjusting tags helps improve both precision (fewer false positives) and relevance (better matches).
Refine Using Text Prompts
You can add or edit positive and negative text prompts to better guide the model.
- Positive prompts tell the model what to look for
- Negative prompts tell the model what to ignore
Example: Prompt =
"soccer"→ general soccer footage returns as positives with high relevance scores. Updated prompt ="soccer goalkeeper"→ refines results to focus on goalkeepers.
When you update a text prompt, the classifier refreshes and the Preview results update.
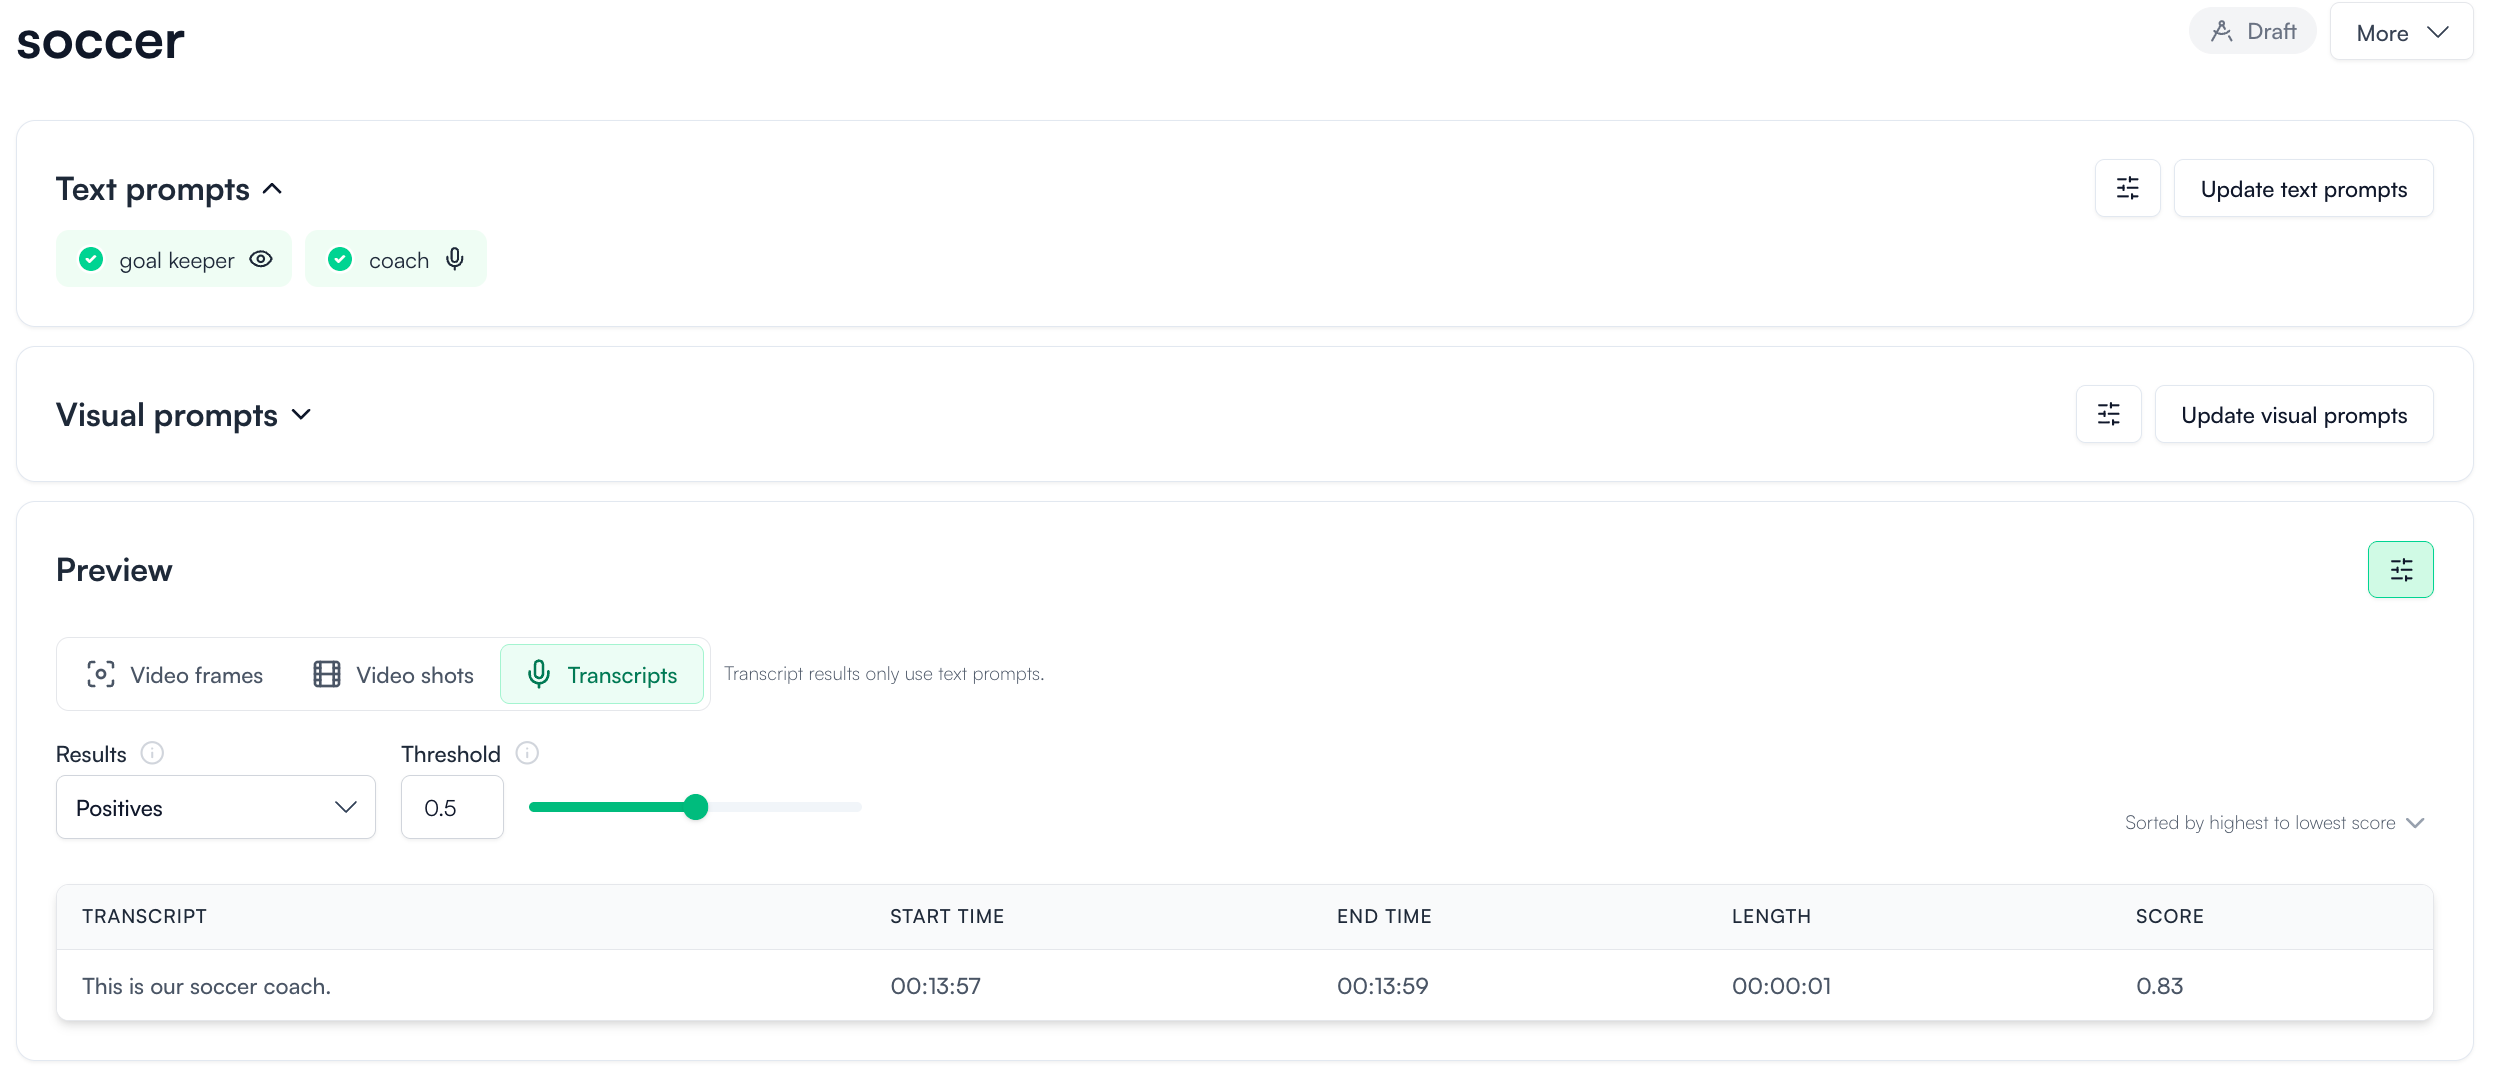
You can also choose a modality for each text prompt. By default, the tag name initializes both visual and transcript classifications, but you can adjust prompts for specific modalities.
Example:
- Visual prompt (keyframes) =
"goal keeper" - Transcript prompt =
"coach"
In this case, the Transcript Preview will only display segments that match "coach."
LLM-Generated Text Prompts
Sometimes abstract tags can be tricky: it’s not always obvious how to phrase a prompt so the model classifies effectively. To help, the system now provides LLM-generated text prompts for each modality.
Example: tagging “scary scenes”
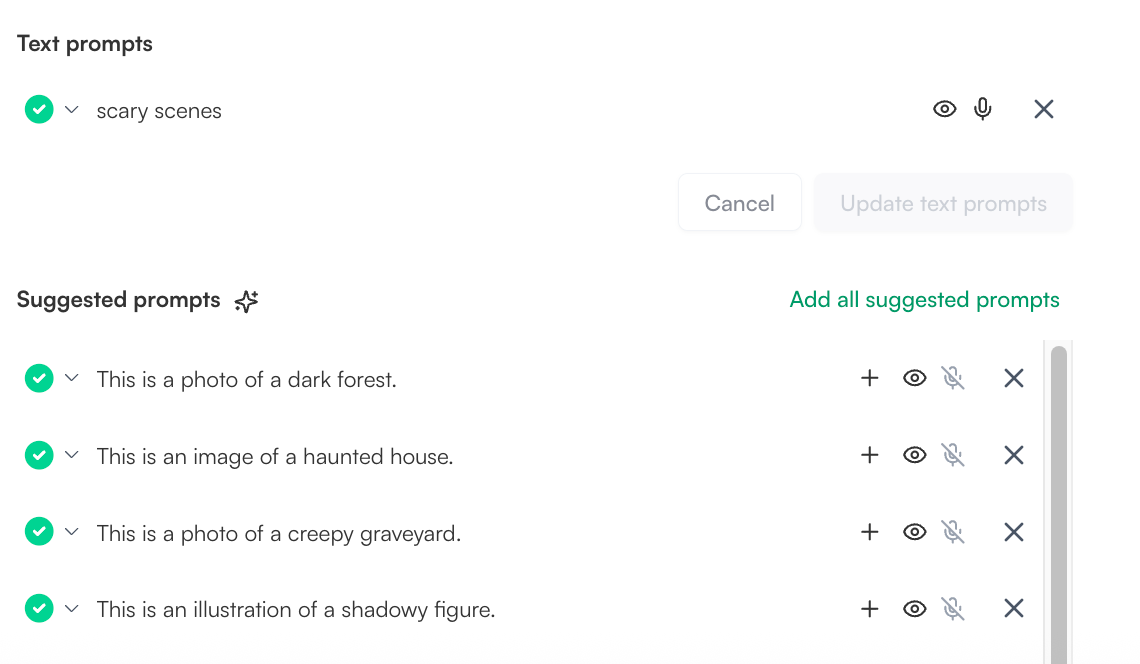
You can choose individual suggestions or add all suggested prompts at once to improve classification.
Refine Using Visual Labels
For keyframes, you can improve tag accuracy by giving visual feedback.
💡 Important: Use text prompts first whenever possible - they’re faster and more effective. Visual labels require at least 50-60 examples to achieve similar impact.
Three Ways to Add Visual Prompts
1. Label from the Preview Page
Hover over the asset you want to label and click the appropriate button (positive or negative). You can bulk label multiple assets. When finished, click “Add visual prompts” to confirm.
2. Add from Semantic Search
Use semantic search to quickly find relevant examples and add them as visual prompts.
- Click “Update visual prompts”
- Select “Add from search”
- Enter a query that matches your tagging definition (e.g.,
"jury duty") - Choose assets from the results to label as positive examples
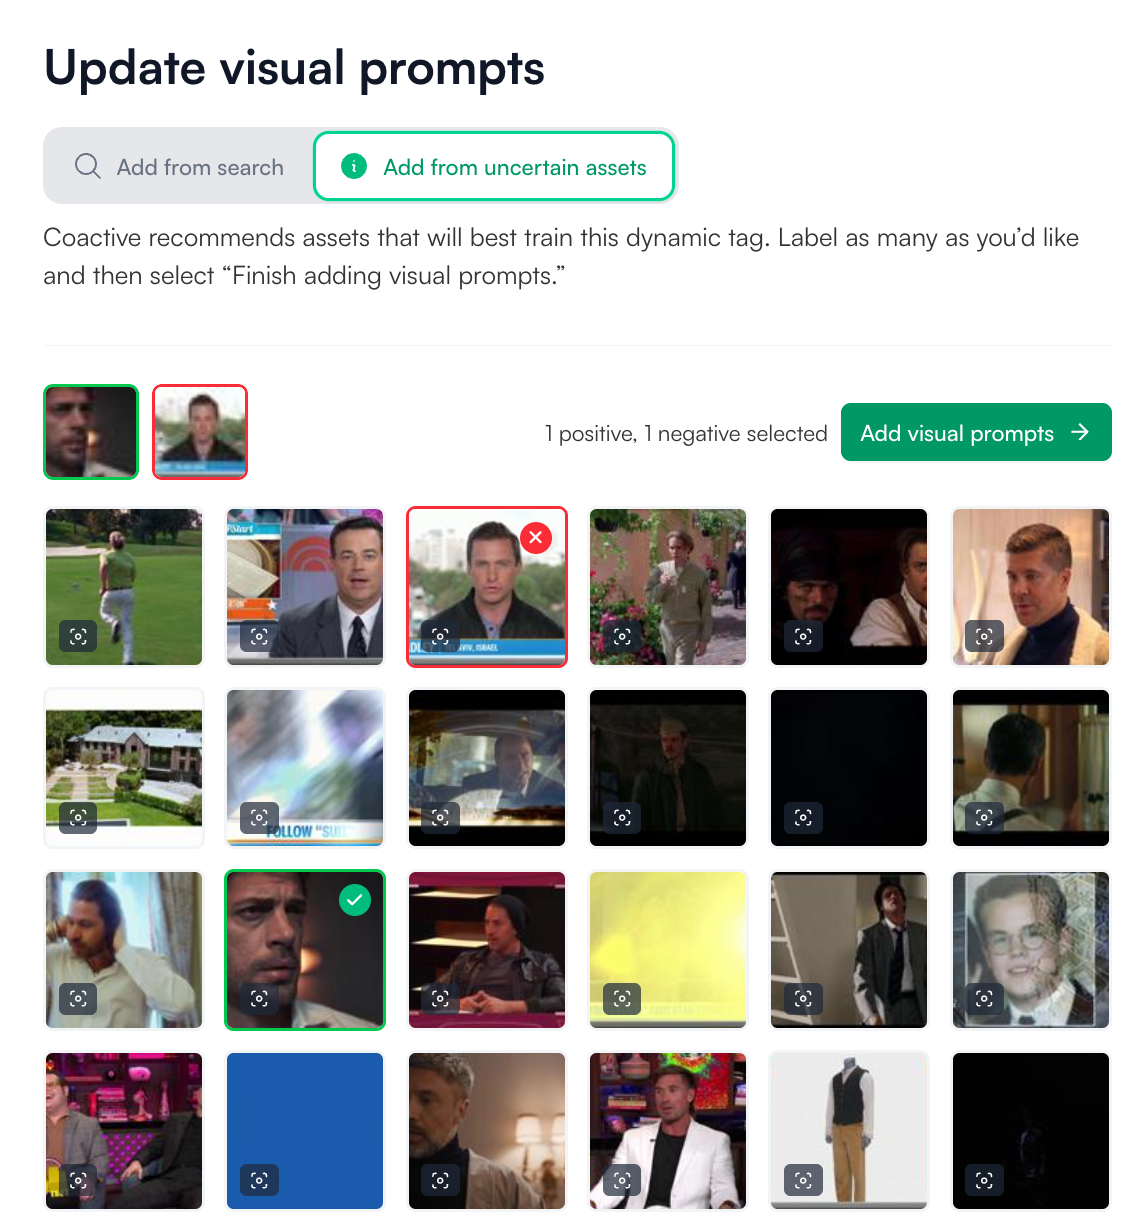
3. Add from Uncertain Assets (available only after the tag group is published)
After publishing a tag, the system highlights the assets it is most uncertain about. Labeling these helps refine the decision boundary and improves model accuracy.
- Click “Update visual prompts” in the upper-right corner
- Select “Add from uncertain assets”
- Review the suggested assets and label them as positive or negative
💡 Note: In this version, human feedback is only supported for keyframes. Feedback on video shots and transcripts is not available.
Manage Tag Groups
Publish a Tag Group
After reviewing the Preview pages of all tags in a group, the group will be in Draft state, meaning it’s ready to be published. Publishing makes the group available for scoring on datasets within your organization.
When publishing, choose a visibility option:
- Secret: The group is only available to the dataset it was trained on
- Shareable: The group is visible to other datasets within your org, allowing admins or editors to apply it directly
Once you click “Publish group”, scoring is automatically triggered on the training dataset.
💡 Note: Non-training datasets can apply a tag group created from a training dataset (to score assets), but they cannot edit the tag definitions.
Check Scoring Progress
You can track the progress of all tag groups applied to a dataset by going to the Dataset Page and selecting “Manage groups.”
From here, you’ll see:
- Which tag groups are applied
- Their current scoring status (e.g., Queued for scoring, Unscored, Scored, Error)
- Whether the dataset is the group’s training dataset or just applying the tag group
You can also add a tag group trained on another dataset by searching for it here. Once you click “Save,” scoring will automatically start on the current dataset.
Scored = The scoring tables are complete and available for querying (more on this in the next section).
Check Tag Group Application
To see which datasets are using a tag group:
- Go to the Dynamic Tag Group Page
- Click “Dataset access”
You’ll see a list of all datasets where the group has been applied.
💡 If a non-training dataset is not using the latest published version, an “Update available” tab will appear next to it.
Post-Publish Evaluation
Preview Updates
After publishing a tag group, it’s recommended to revisit the Tag Preview Page:
The keyframe previews are refreshed to reveal more balanced results. Instead of showing randomly selected frames (pre-scoring), the system now uses stratified sampling:
- 10 keyframes are selected from each scoring bucket
- This ensures the Preview displays a more even distribution of positives and negatives
Tag Evaluator
After publishing a tag group, you can quantitatively evaluate its performance with LLM-generated ground truth.
Clicking “Evaluate performance” on the Preview Page will trigger this workflow. The system selects a sample of about 400 assets and sends them to an LLM for classification. You’ll then review the results at both the keyframe and shot levels, removing any items you judge to be inaccurate.
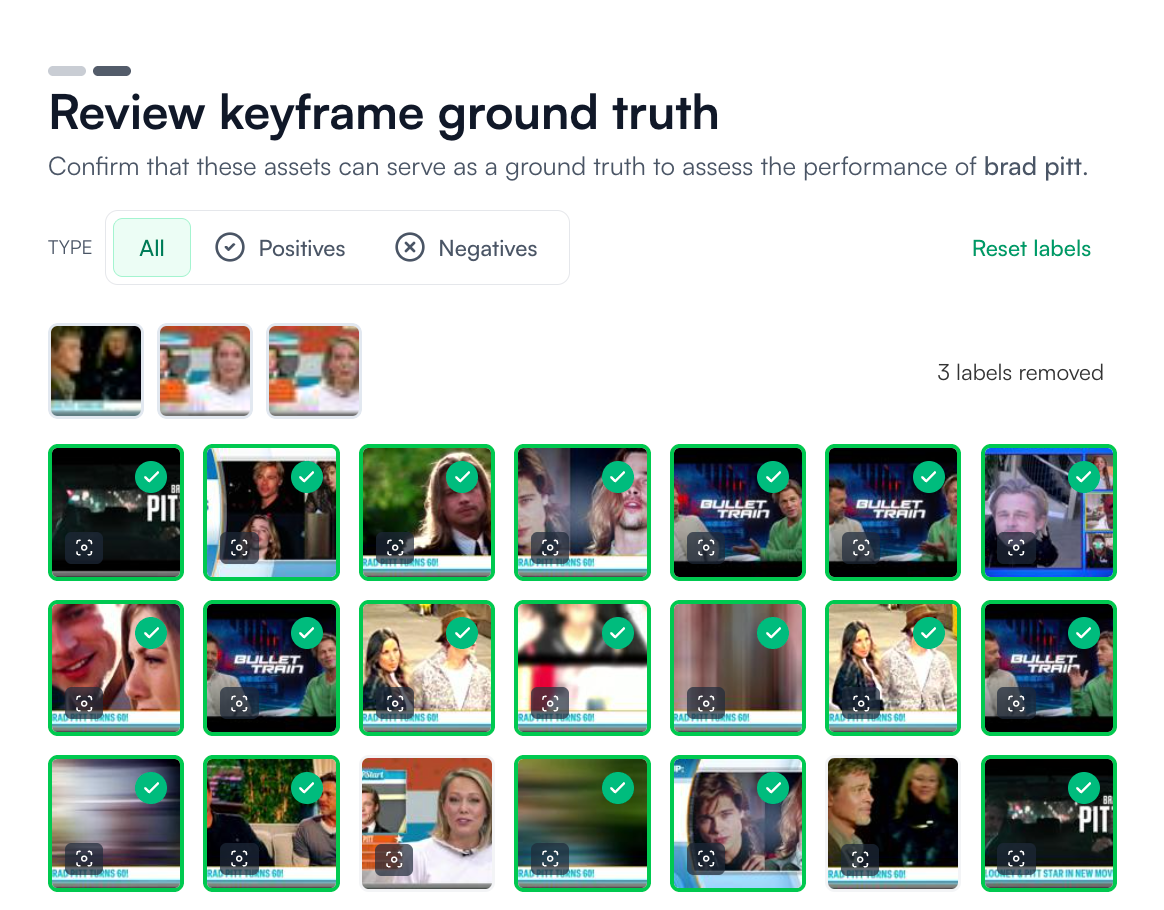
The cleaned Ground Truth dataset is then used to assess how well your tag performs.
The metrics page helps you evaluate and fine-tune the threshold used for tag classification by balancing different performance metrics.
At the top, you can choose which metric to optimize for:
- F-1 score (default): balances precision and recall
- F0.5 score: emphasizes precision slightly more
- Precision: measures how many predicted positives are truly positive
- Accuracy: overall correctness across positives and negatives
- Recall: measures how many actual positives were captured
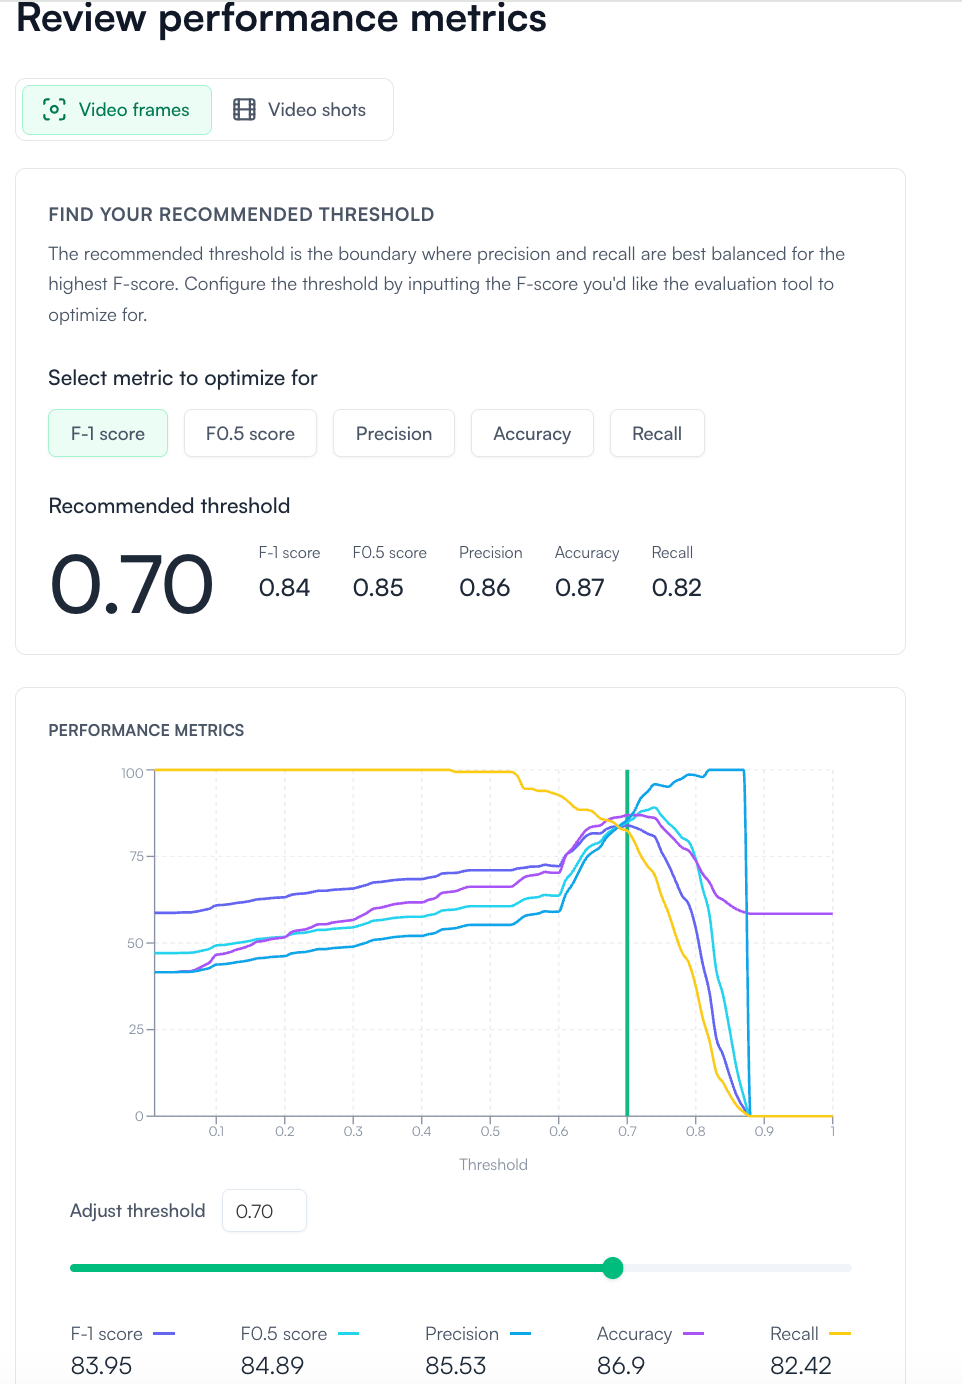
The system calculates and suggests a threshold (e.g., 0.70) where the chosen metric is maximized or best balanced. The corresponding values for F-1, F0.5, Precision, Accuracy, and Recall are displayed alongside.
The line chart shows how each metric changes as the threshold varies between 0 and 1:
- Each line corresponds to a different metric
- The vertical green line marks the recommended threshold
- This visualization makes it easier to understand tradeoffs (e.g., higher precision often lowers recall)
Below the chart, you can manually adjust the threshold using a slider or input box. As you change it, the values for each metric update in real time, letting you pick a threshold that best fits your use case.
Finally, you can apply and save a threshold. When you do, the system returns you to the Preview Page, where you can immediately see how this threshold affects the results through sample previews.
The saved threshold is also applied downstream in the scoring tables, populating the “threshold decision” column with a binary value (tagged / not tagged).
Querying the Data
Once your dynamic tags are active, you can explore and analyze results directly in the Query tab using SQL.
Dynamic Tag Tables (V3)
dt_[dynamic tag group name]_visual
dt_[dynamic tag group name]_transcript
dt_[dynamic tag group name]_shot
dt_[dynamic tag group name]_video
Joining for Advanced Analytics
To perform more advanced video analytics, such as:
- Aggregating keyframes by
coactive_video_id - Filtering by keyframe timestamp (
keyframe_time_ms) - Enriching results with metadata fields like
SeriesName,EpisodeName, orkeyframe_index
You’ll need to join the Dynamic Tag tables with the coactive_table and optionally coactive_table_adv.
